Introduction to Sampling Strategies
Imagine you want to find out how polluted a river is. You can't test every single drop of water that would take forever! So instead, you collect a sample. A sample is a smaller group that represents the whole. The way you choose your sample is called your sampling strategy and it matters a lot. Choose badly and your results will be rubbish. Choose well and you'll get data that actually tells you something useful.
In iGCSE Environmental Management, fieldwork investigations are a key part of the course. You need to understand not just how to collect data, but why you collect it in a particular way. That's where sampling strategies come in.
Key Definitions:
- Sample: A selected group taken from a larger population or area to represent the whole.
- Sampling strategy: The method used to decide which items, locations, or people to include in your sample.
- Population (in statistics): The entire group you are studying could be people, plants, soil samples, or anything else.
- Bias: When your sample doesn't fairly represent the whole population, leading to inaccurate conclusions.
- Representative sample: A sample that accurately reflects the characteristics of the whole population or area.
- Quadrat: A square frame (often 0.5m × 0.5m or 1m × 1m) used to sample plants or animals in a set area.
- Transect: A line across an area along which samples are taken at regular intervals.
❓ Why Do We Sample?
It's simply not practical to study everything. A forest might have millions of trees. A beach might have billions of sand grains. Sampling lets us study a manageable chunk and use it to draw conclusions about the bigger picture. The key is making sure our sample is fair and representative otherwise our conclusions won't be reliable.
⚠ What Happens Without Good Sampling?
Poor sampling leads to bias. For example, if you only survey people near a factory to ask about air quality, you'll miss people who live further away. Your results will be skewed. Good sampling strategies help us avoid this and make our fieldwork actually meaningful.
The Three Main Sampling Strategies
There are three core sampling methods you need to know for iGCSE Environmental Management. Each one works differently and suits different situations. Let's break them down one by one.
🎲 1. Random Sampling
In random sampling, every location, person, or item in the population has an equal chance of being selected. It's like pulling names out of a hat no favourites, no patterns. This removes human bias completely because you're not choosing what to study; chance is doing it for you.
How to do it: Use a random number generator (or random number tables) to pick coordinates on a grid map. Then go to those exact spots and collect your data.
✅ Advantages
Removes bias completely. Every point has an equal chance. Results are statistically valid and can be used in calculations.
❌ Disadvantages
Can miss important areas by chance. Might cluster samples in one part of the study area. Not great when you know there are distinct zones to study.
🌏 Best Used For
Large, uniform areas with no obvious zones like a flat grassland or a uniform section of beach. Also good when you want statistically defensible results.
🔎 Example: Random Sampling in a Grassland
A student investigating plant diversity in a school field uses a 10m × 10m grid. They generate 20 pairs of random numbers between 1 and 10 using a calculator. They place a quadrat at each coordinate and record which plant species are present. Because the points were chosen randomly, there's no risk the student unconsciously picked "interesting" spots.
📏 2. Systematic Sampling
Systematic sampling means collecting data at regular, fixed intervals. Instead of random chance, you follow a set pattern every 5 metres, every 10th person, every third tree. It's organised, predictable and easy to carry out in the field.
How to do it: Lay a tape measure across your study area. Take a sample every set distance say, every 2 metres. This is often done along a transect line.
✅ Advantages
Easy to carry out. Covers the whole area evenly. Great for detecting gradual changes across a space (like from a river bank inland).
❌ Disadvantages
Can accidentally match a natural pattern (e.g., if trees are planted every 5m and you sample every 5m, you might always hit or always miss them). Not truly random.
🌏 Best Used For
Studying changes along a gradient like vegetation change from a sand dune to inland, or pollution levels along a river. Also good for surveys along roads or transects.
🔎 Case Study: Sand Dune Succession Studland Bay, Dorset, UK
Studland Bay is a classic fieldwork location for studying plant succession on sand dunes. Students lay a transect line from the shoreline inland (sometimes over 500 metres). Every 10 metres, they place a quadrat and record plant species and percentage cover. This systematic approach clearly shows how vegetation changes as you move away from the sea from bare sand near the shore, to marram grass, to shrubs, to woodland further inland. The regular intervals make it easy to spot the gradient of change.
🏁 3. Stratified Sampling
Stratified sampling is used when your study area or population has distinct groups or zones (called strata). You divide everything into these groups first, then sample from each group in proportion to its size. This makes sure every group gets fair representation no group gets ignored just because it's smaller.
How to do it: Identify the different strata (zones or groups). Work out what proportion of the total each one represents. Then collect that proportion of your total samples from each group. You can use random or systematic sampling within each stratum.
✅ Advantages
Ensures all groups are represented. More accurate than pure random sampling when clear zones exist. Reduces bias between different areas or groups.
❌ Disadvantages
More complex to plan and carry out. You need to know your strata in advance. Harder to do if the boundaries between zones aren't clear.
🌏 Best Used For
Areas with clear, distinct zones like different land uses in a town, different habitats in a nature reserve, or different age groups in a population survey.
🔎 Example: Stratified Sampling in a Nature Reserve
A nature reserve has three habitat types: woodland (covers 50% of the area), grassland (30%) and wetland (20%). A student wants to take 100 samples total. Using stratified sampling, they take 50 samples from woodland, 30 from grassland and 20 from wetland. This means every habitat is fairly represented in the final results the woodland doesn't dominate just because it's bigger and the wetland isn't ignored just because it's smaller.
Comparing the Three Methods
It helps to see all three methods side by side. Here's a quick comparison to help you remember which is which:
| Method |
How It Works |
Best For |
Risk of Bias? |
| 🎲 Random |
Chance decides every sample point |
Uniform areas, statistical analysis |
Very low |
| 📏 Systematic |
Fixed intervals along a line or grid |
Gradients and transects |
Low (but pattern risk) |
| 🏁 Stratified |
Proportional samples from each zone |
Areas with distinct zones/groups |
Low (if strata are correct) |
Sampling Tools Used in the Field
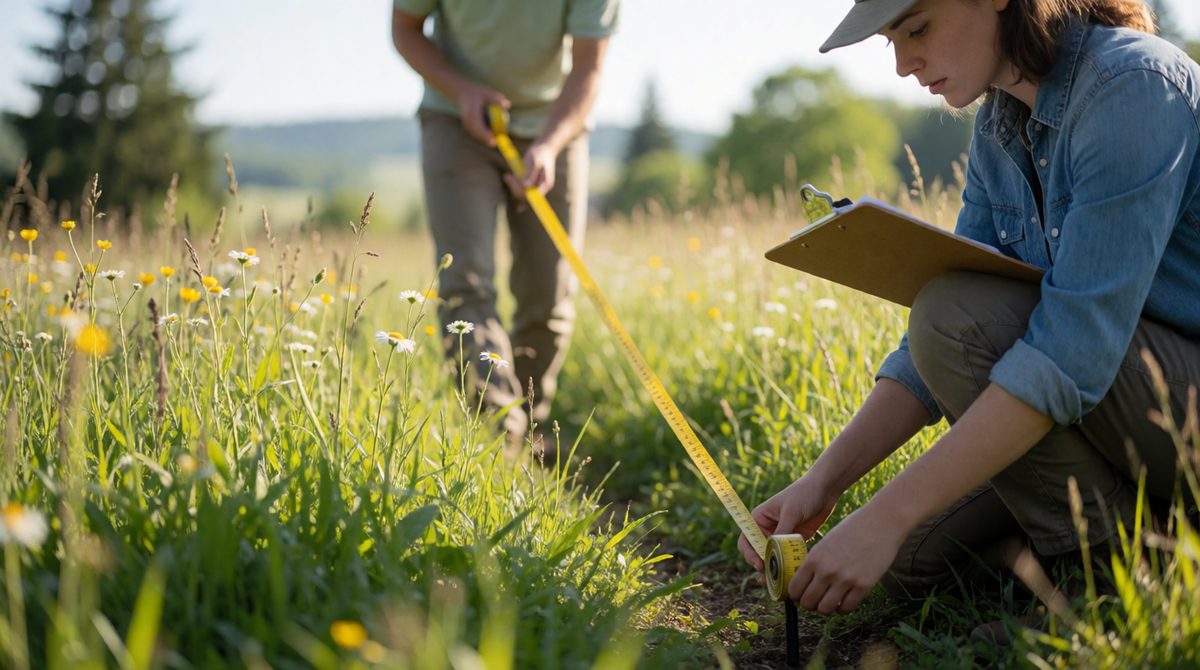
Transects show how plants change across an area
Knowing your strategy is only half the job you also need to know the tools used to actually collect the samples.
■ Quadrats
A quadrat is a square frame placed on the ground to mark out a sample area. Inside the quadrat, you record what's there plant species, percentage cover, number of organisms. Common sizes are 0.5m × 0.5m or 1m × 1m. Quadrats are used with both random and systematic sampling. They're brilliant for studying vegetation and ground-level ecosystems.
📏 Transects
A transect is a straight line usually a tape measure laid across a study area. You take samples at set points along it (systematic sampling). A belt transect records everything within a set width on either side of the line. A line transect only records what the line actually crosses. Transects are perfect for showing gradual environmental changes.
Avoiding Bias The Golden Rule of Fieldwork
Bias is the enemy of good fieldwork. It creeps in when your sampling method or your own choices means some things are more likely to be sampled than others. Here are the most common sources of bias and how to beat them:
- 👉 Researcher bias: Unconsciously choosing "interesting" spots. Fix it: use random numbers to pick locations.
- 👉 Accessibility bias: Only sampling places that are easy to reach. Fix it: commit to your pre-planned points, even if they're awkward.
- 👉 Time bias: Only sampling at one time of day. Fix it: repeat sampling at different times if possible.
- 👉 Sample size bias: Using too few samples. Fix it: the larger the sample, the more reliable the results.
💡 Exam Tip: Evaluating Sampling Methods
In the exam, you might be asked to evaluate a sampling strategy used in a fieldwork investigation. Always think about: Was it representative? Was there any risk of bias? Was the sample size large enough? Could a different method have been better? Use the names of the three strategies confidently examiners love to see you use the correct terminology.
Sample Size How Many is Enough?
There's no magic number, but the bigger your sample, the more reliable your results. A sample of 5 is almost never enough. A sample of 30+ starts to become statistically meaningful. In environmental fieldwork, you'll often aim for at least 20–30 sample points, depending on the size of the study area.
Think of it this way: if you flip a coin 4 times and get heads every time, does that mean the coin always lands heads? No your sample was too small. Flip it 100 times and you'll get much closer to 50/50. The same logic applies to environmental sampling.
🌎 Real-World Link: Environmental Impact Assessments
Professional environmental scientists use these exact same sampling strategies when carrying out Environmental Impact Assessments (EIAs) official surveys done before major construction projects. Before building a new road or housing estate, scientists must survey the wildlife, soil, water and vegetation in the area. They use stratified, random and systematic sampling to make sure their survey is thorough and unbiased. The results influence major planning decisions. So the skills you're learning here are genuinely used in the real world!
Putting It All Together Choosing the Right Strategy
When planning fieldwork, ask yourself these questions to pick the right sampling strategy:
- ➡ Is my study area uniform with no obvious zones? → Use random sampling.
- ➡ Am I studying a gradient or change along a line? → Use systematic sampling along a transect.
- ➡ Does my study area have clearly different zones or groups? → Use stratified sampling.
- ➡ Not sure? → You can combine methods e.g., stratified sampling to divide the area into zones, then random sampling within each zone.
Remember: there's rarely one perfect answer. In the exam, what matters is that you can justify your choice and explain its strengths and weaknesses.